Authoring the App Tour
This page explains how the App Tour was generated and how to regenerate or refresh it.
Screenshots are captured from platform running locally, or from production — never from
preview. This is deliberate, not a convenience choice: environmentLabel — the purple "Preview
Environment" banner and the [PRE] page-title prefix — comes from window.__APP_CONFIG__, which
the backend injects at serve time. Vite's local dev server never injects it and production sends
it empty, so both render exactly like production. Preview cannot suppress its banner, so it can
never produce a customer-accurate screenshot.
The two valid sources differ in one visible detail, so don't mix them within a page. The sidebar
version under "Handheld Tag Reader" comes from VITE_APP_VERSION, which is injected at Docker
build time and unset under Vite — so local dev reads dev where production reads the release
(v1.4.0). Capturing against production also means the org you sign in as supplies the
capability set, and every locked nav entry is visible in every frame: granting or revoking one
changes the sidebar on all screens, not just the screen that capability gates.
Prerequisites
-
A
trakrf/platformcheckout (sibling to this repo works fine —~/platformis assumed below; adjust the paths if yours sits elsewhere, e.g.~/trakrf/platform). -
Docker, for platform's local database and backend.
-
pnpm installcompleted in this repo's root. -
Playwright MCP available to the authoring agent — it's the only capture tool used; there is no separate deterministic script anymore.
-
.envpresent. Start by copying.env.example:cp .env.example .envFill in
TRAKRF_DOCS_USER_EMAIL/TRAKRF_DOCS_USER_PASSWORDonce you've created the docs account (see below).TRAKRF_LOCAL_URLdefaults tohttp://localhost:5173and shouldn't need changing. -
Run the platform commit that matches what's actually in production. Screenshots are supposed to document what customers see — capturing against an ahead-of-prod or behind-prod checkout will quietly drift the docs from reality.
Starting the local stack
From ~/platform:
just dev                    # database + backend + migrations
just frontend dev-bridge    # frontend on http://localhost:5173, wired to the reader bridge
just dev brings up the database and backend in Docker and runs migrations. just frontend dev-bridge serves the app on http://localhost:5173 connected to the RFID reader bridge rather
than the plain dev server.
Non-interactive shells don't load platform's .env.local. If you're driving these commands
from an agent or script rather than an interactive terminal, platform's just recipes will fail
with PG_URL environment variable not set because direnv never fired. Prefix each command:
direnv exec /home/mike/platform just dev
direnv exec /home/mike/platform just frontend dev-bridge
The reader bridge
No extra setup is needed here — the bridge host comes from BLE_MCP_HOST in
~/platform/.env.local, loaded automatically via platform's .envrc. As long as the bridge
server and physical reader are reachable at that host, just frontend dev-bridge connects to
them on its own.
Start the bridge before the frontend. dev-bridge health-checks the bridge on startup and
exits rather than serving if it can't reach it, so http://localhost:5173 never comes up at all.
That gates every capture, not just the connected-reader ones. Check it first:
curl -s http://$BLE_MCP_HOST:8081/health
The physical bench
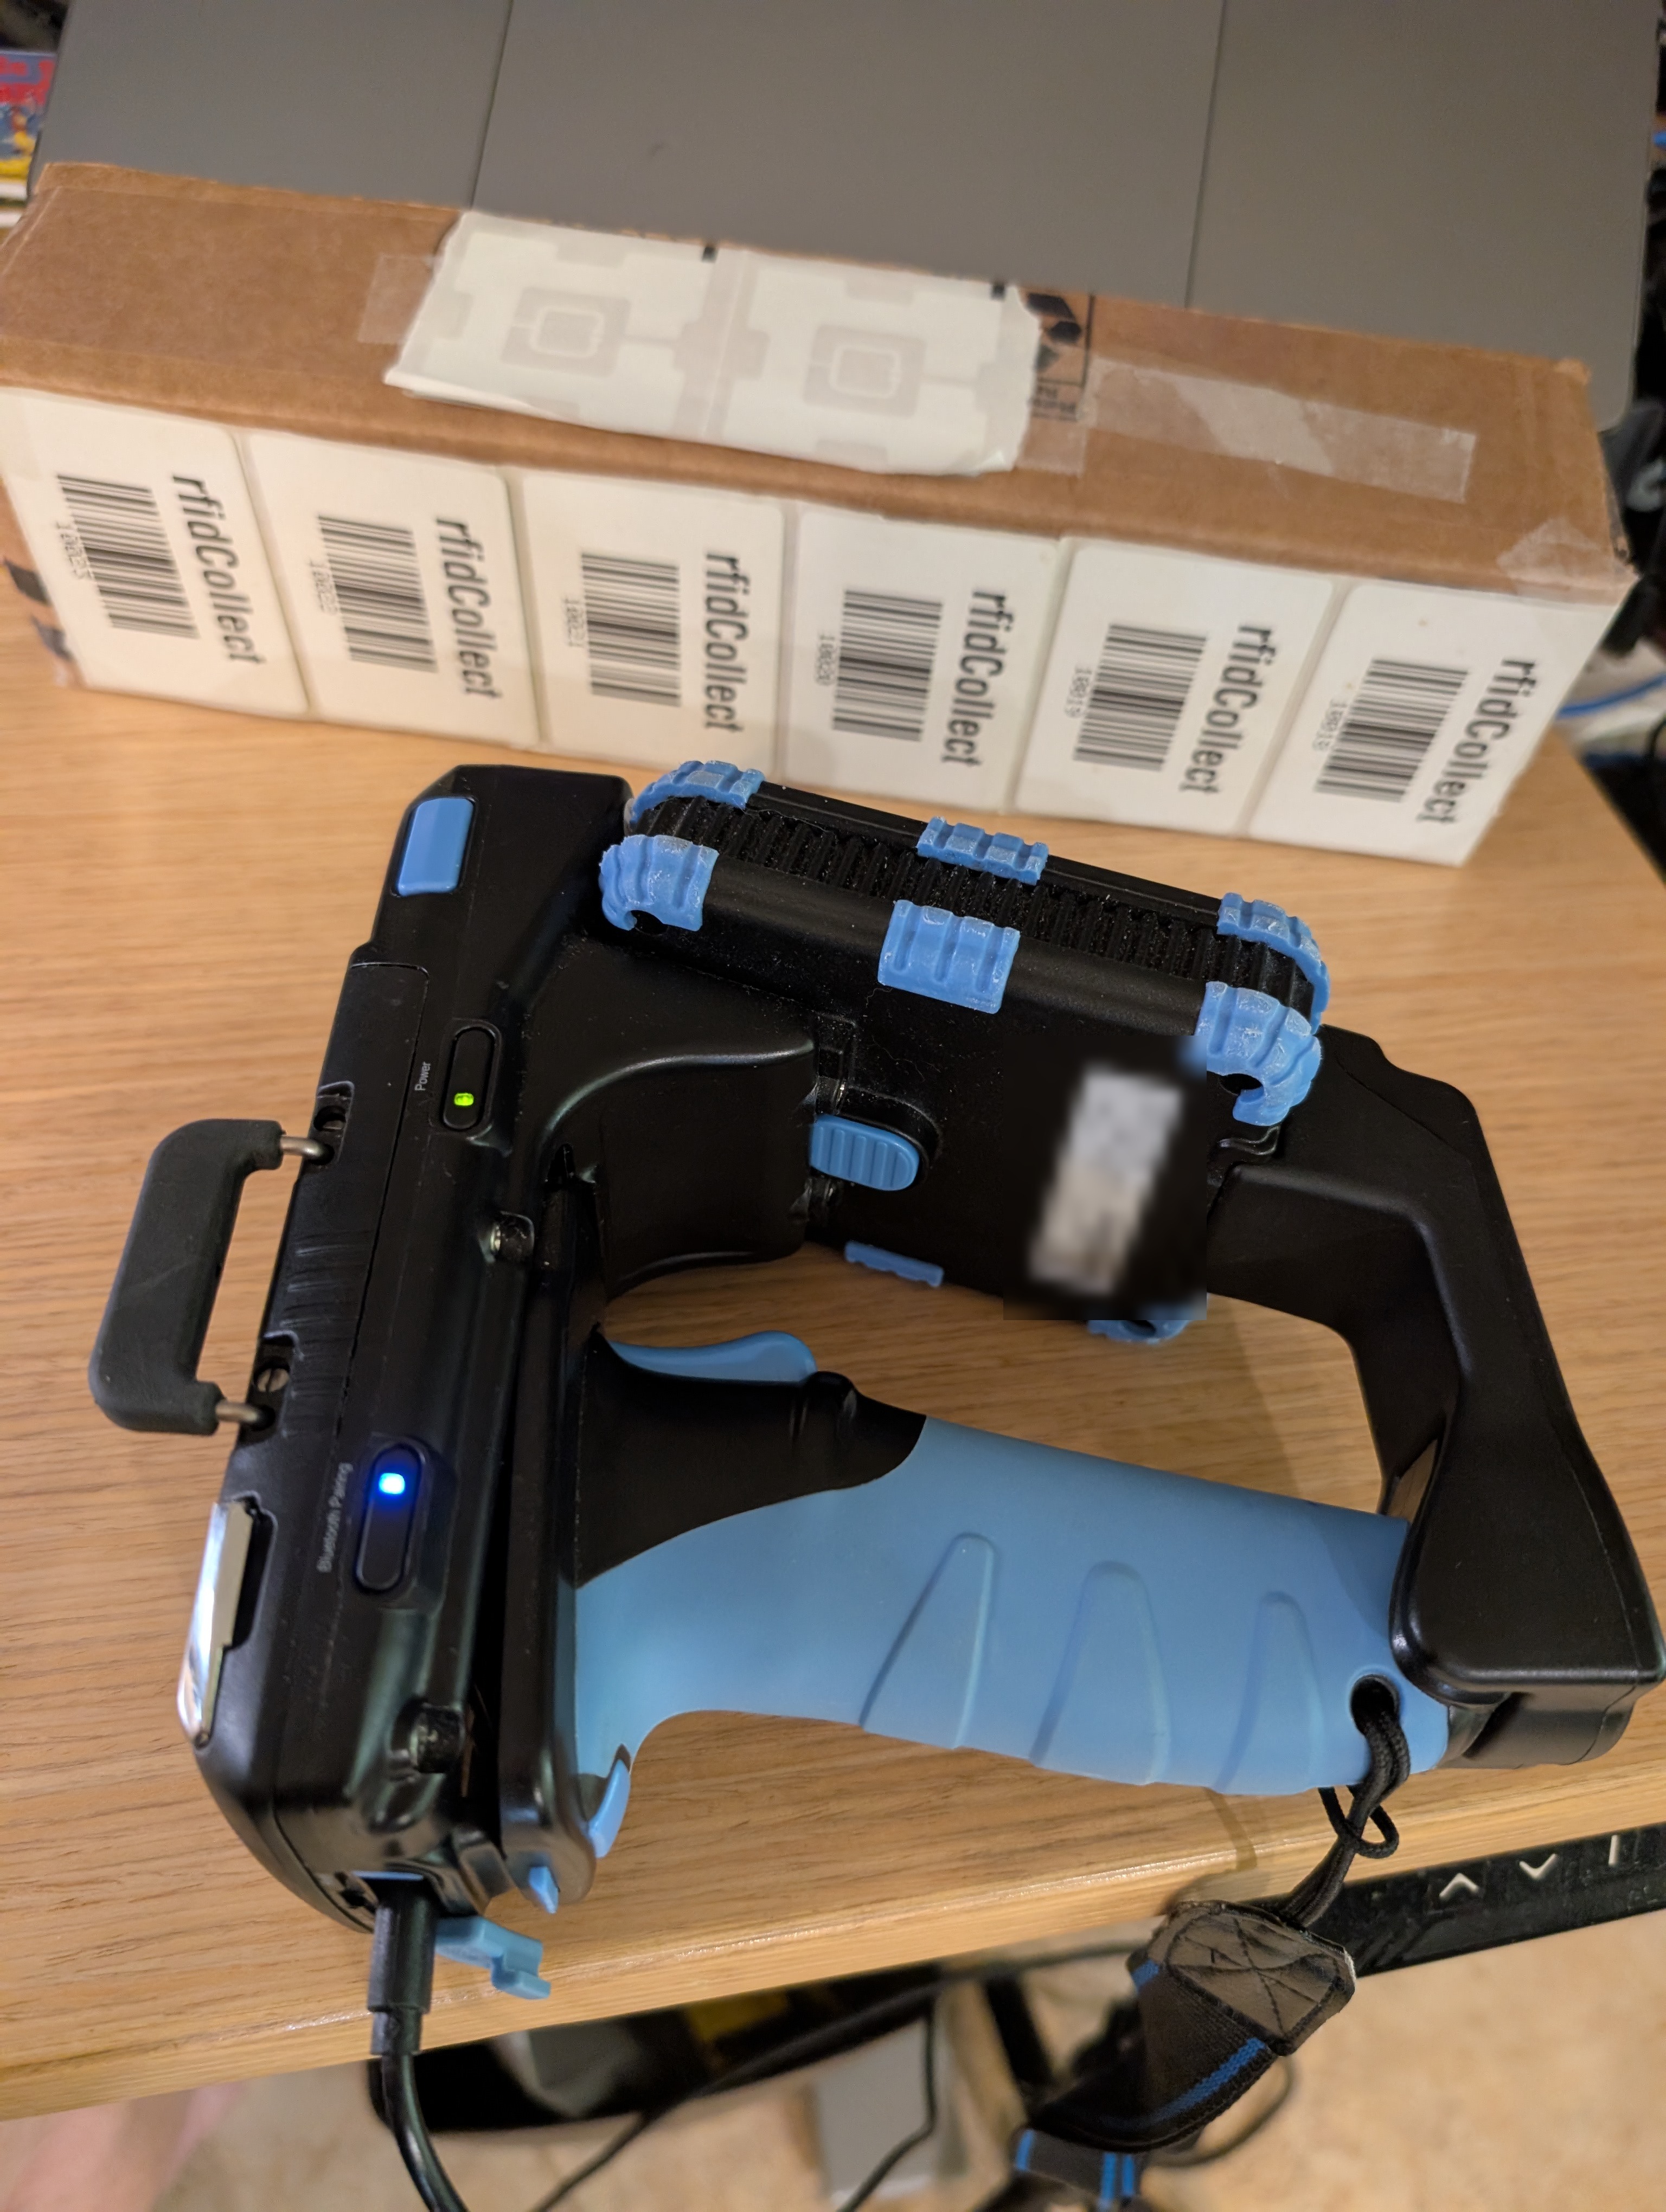
The other end of the bridge is a CSL CS108 UHF RFID handheld with a phone mounted in a 3D-printed cradle, pointed at a box carrying the bench tags. Every capture showing real reads — Scan, Locate, and anything downstream of a saved scan — comes from this setup.
The bench tags are rfidCollect labels printed 10018 through 10023. The printed number
is not literally the EPC: the EPC is zero-padded, and the leading zeros are trimmed by tag-value
normalization, which is what makes a read line up with the number on the label. A long zero-padded
value in raw reader output and a short one in the app are the same tag, not two — don't chase it as
a mismatch when reconciling a capture against the bench.
Expect more than the labelled tags to read. Alongside 10018–10023 there are soak-test tags, two unmarked tags taped to the cardboard, and assorted strays around the bench — so a scan total is never just the labelled six, and it shifts session to session.
The bulk stock — several hundred tags — lives in a closed metal toolbox, which shields it from the reader. Leave that toolbox shut during captures. Opening it puts hundreds of tags in range and every scan-derived screenshot becomes unusable. See Captures that need a saved scan first — alt text should follow the capture, not the reverse.
Confirm it's rendering prod-like
Before capturing anything, open http://localhost:5173 and check two things: no purple
environment banner, and the browser tab reads TrakRF with no [DEV]/[PRE] prefix. This is
the entire reason captures happen locally — if a banner appears, something is injecting
__APP_CONFIG__ and the capture source is wrong. Stop and diagnose before continuing.
The fixture: the "TrakRF Docs" org
-
Sign up through the local UI at
http://localhost:5173/#signup, using an organization name of exactlyTrakRF Docs— the seed script matches on that string. Company Website and Phone are required by client-side validation; leaving them blank silently fails the submit with inline errors and no request is sent. -
Run
scripts/seed-docs-org.sqlagainst the local database (just database psql < scripts/seed-docs-org.sql, or the equivalentdocker execinvocation for your local stack).Use
just database psqlif you can.pgcryptois installed into thetrakrfschema, so the id-generation functions the seed calls needtrakrfon thesearch_path. A baredocker exec … psqlconnects with the default search path and dies onfunction hmac(bytea, bytea, unknown) does not exist; passPGOPTIONS='-c search_path=trakrf,public'if you go that route. -
Clear the browser's local storage and reload. Signing up before seeding means the app has already cached an empty asset list, and the store's TTL is an hour — so a freshly seeded org renders as "No assets yet" until the cache is dropped. Keep
auth-storageif you don't want to log in again.
The script seeds 8 assets and 5 locations, grants the geofence capability so the Outputs and
Geofence defaults pages render real UI instead of a locked upsell page, and creates a second,
empty organization (TrakRF Docs Empty) for empty-state captures — the seeded org always has
data, so empty-state screenshots need a separate org.
Mustering and kitting stay ungranted on purpose. Those surfaces are out of scope for this tour, and a locked Mustering tile ("Not enabled for your organization") appearing in the nav is the accurate, intended state for this org — not a defect to fix.
Five of the seed's registered assets carry sequential bench RFID tags (10018–10022), matching
a physical reader on the bench. A sixth bench tag, 10023, is deliberately left unregistered.
Scanning with the bridge-connected reader against this fixture produces a meaningful spread
across all five Scan tiles: Found and Missing from the registered tags, and Extra
from the one that isn't on any asset.
Capturing
For each screen, at each of two viewports — 1440×900 desktop and 390×844 mobile — take a viewport-only screenshot with Playwright MCP. Re-navigate to the page after resizing, not just resize in place: several screens size their layout at mount time, so a resize-only capture can show a desktop layout scaled into a mobile viewport instead of the actual responsive layout.
Screenshots must be viewport-only, never full-browser. This is the single most important rule on this page. Two previously published images captured the full browser chrome, leaking the author's personal bookmarks bar — email, calendar, job-search bookmarks — into customer-facing documentation. Always crop to the viewport; never ship a capture that includes the address bar, tab strip, or bookmarks bar.
Playwright MCP writes screenshots to its own working directory — the repository root of the
main checkout, not necessarily the worktree or directory you're working in. Every capture has to
be moved into static/img/app-tour/ (or static/img/user-guide/) explicitly; don't assume the
file landed where you're currently working.
What can't be recaptured
static/img/user-guide/pairing-dialog.png cannot be recaptured through this workflow. The
browser's native Bluetooth pairing dialog is OS/browser chrome that Playwright cannot screenshot,
and the reader bridge bypasses pairing entirely (it connects without ever showing that dialog).
The current image is cropped from an earlier, pre-bridge capture rather than reshot.
Verify row counts before trusting a capture
In local dev, React's StrictMode double-invokes an effect on the Assets screen that appends to
state instead of replacing it, so the page renders every row twice — 16 rows and a
Total Assets 16 tile against a fixture of 8. Production builds don't do this, so a screenshot
taken this way shows something no customer will ever see.
It is easy to miss, and it contaminated four images the first time this tour was captured,
including the dimmed background behind the create-asset modal. Before capturing any page that
lists data, check the visible count against the fixture: 8 assets, 5 locations. If the
numbers are doubled, temporarily remove React.StrictMode from
platform/frontend/src/main.tsx, recapture, and restore it afterwards.
It is intermittent — do the check even if a previous pass looked clean. The underlying defect is still open, but it did not reproduce at all during the second capture pass. Seeing correct counts tells you nothing about the next page you load.
Captures that need a saved scan first
Four images show data that only exists after a scan has been saved against a location, and
they will silently capture as empty if taken too early:
app-tour/assets-desktop.png, user-guide/assets-populated.png,
app-tour/reports-desktop.png, and user-guide/reports-populated.png.
The sequence that produces them:
-
Connect the reader, scan on the Scan screen, then Stop.
-
Click Select next to "No location tag detected" and pick Warehouse A.
-
Click Save.
-
Refresh the continuous aggregate.
trakrf.asset_scan_latestis a TimescaleDB continuous aggregate, so the Assets Location column and every Reports figure stay empty until it materialises:CALL refresh_continuous_aggregate('trakrf.asset_scan_latest', NULL, NULL); -
Reload, then visit Locations once before capturing Assets. The Location column renders whatever the location-metadata cache holds — with a cold cache it prints raw external keys (
LOC-WAREHOUSE-A) instead of display names (Warehouse A).
Expect the scanned-tag count to differ from whatever the prose currently claims. The reader picks up soak-test tags and strays well beyond the labelled bench tags (see The physical bench), so the total varies per session — update the alt text to match the capture rather than re-shooting for a specific number.
Locate has a Start button
Locate exposes an on-screen Start button once a reader is connected — it is not trigger-only. Use it to drive a capture rather than assuming a hardware trigger pull is required.
Scripted captures can lose the first click. A script that fills in the EPC and clicks Start back-to-back can land inside a narrow window where the reader is still settling and the click is dropped — Status stays on Idle and no scan starts. Have the script wait for Start to become enabled, or click it twice. Clicking by hand, or pulling the physical trigger, will not hit this. Either way, confirm Status reads Searching before you capture.
Which capture path was used
This tour's screenshots were captured using the physical reader over the bridge, not
simulated Bluetooth notifications — real EPCs, signal strengths, and read counts, rather than
synthesized ones. Prefer the bridge when a reader is available; fall back to
navigator.bluetooth.testing.simulateNotification only if no reader is reachable, and record
which path was used if you regenerate this tour again.
The Readers, Live Reads, Outputs, and Geofence defaults images are the exception: they were
recaptured against production at v1.4.0, signed in to an org granted only geofence. None
of those four screens needs a reader — Live Reads captures its connected-but-idle state, which is
what the published image has always shown — so no bridge was involved.
Things to know
- Credentials are local.
.envis gitignored. Never commit it. Never paste credentials into commit messages or PR descriptions. - Playwright MCP does not write to a subfolder by default. See "Capturing" above — always verify and move each screenshot after taking it.